Vexdata.io Documentation
  • Vexdata Overview
  • Installation
    • System Requirements
    • Windows Installation
    • Linux Installation
    • Cloud Installation
      • GCP
      • Azure
      • AWS Cloud Deployment Architecture Diagram
        • Pre-requisites
        • Manual Install on ec2
        • Cloud Formation Scripts (command line)
    • Admin Post Installation Setup
    • User Post Installation Setup
    • Server Improvement (Optional)
  • Getting Started
    • Roles and Permissions
    • Managing Groups and Projects
      • Folders
      • Projects
    • Settings
      • Slack Integration
      • Integrations
      • Rules
      • Properties
      • Integrations
      • Email Template
      • Report Template
      • Create Data Connections
        • Databases/Warehouses
        • Run On
  • Creating and Executing Test Cases
    • Test Case
      • Create Test Cases
        • Define Data Source and Target
          • Configure Table/s from Database
          • Input SQL Data
          • Input Files
            • Excel/CSV
            • XML
            • JSON
            • Parquet/AVRO
          • API Input
          • Table Filter
          • Advance - Input
        • Data Compare
          • ETL Testing/Cell By Cell Compare
            • Data Compare Mapping
            • Data Compare Options
          • Schema Compare
          • Counts Compare
        • Schema Monitoring
        • Data Quality
          • SQL Rules
          • Column Level Rules
          • Duplicates
      • Executing Test Cases
      • Defining Test Case Settings
    • Test Runs
    • Variables
    • Note
    • Label
  • Reports
    • User Reports
    • Admin Report or Manager Reports
  • Current Limitations
Powered by GitBook
On this page
  1. Creating and Executing Test Cases
  2. Test Case
  3. Create Test Cases
  4. Define Data Source and Target

Input SQL Data

PreviousConfigure Table/s from DatabaseNextInput Files

Last updated 5 months ago

To provide one or more SQLs:
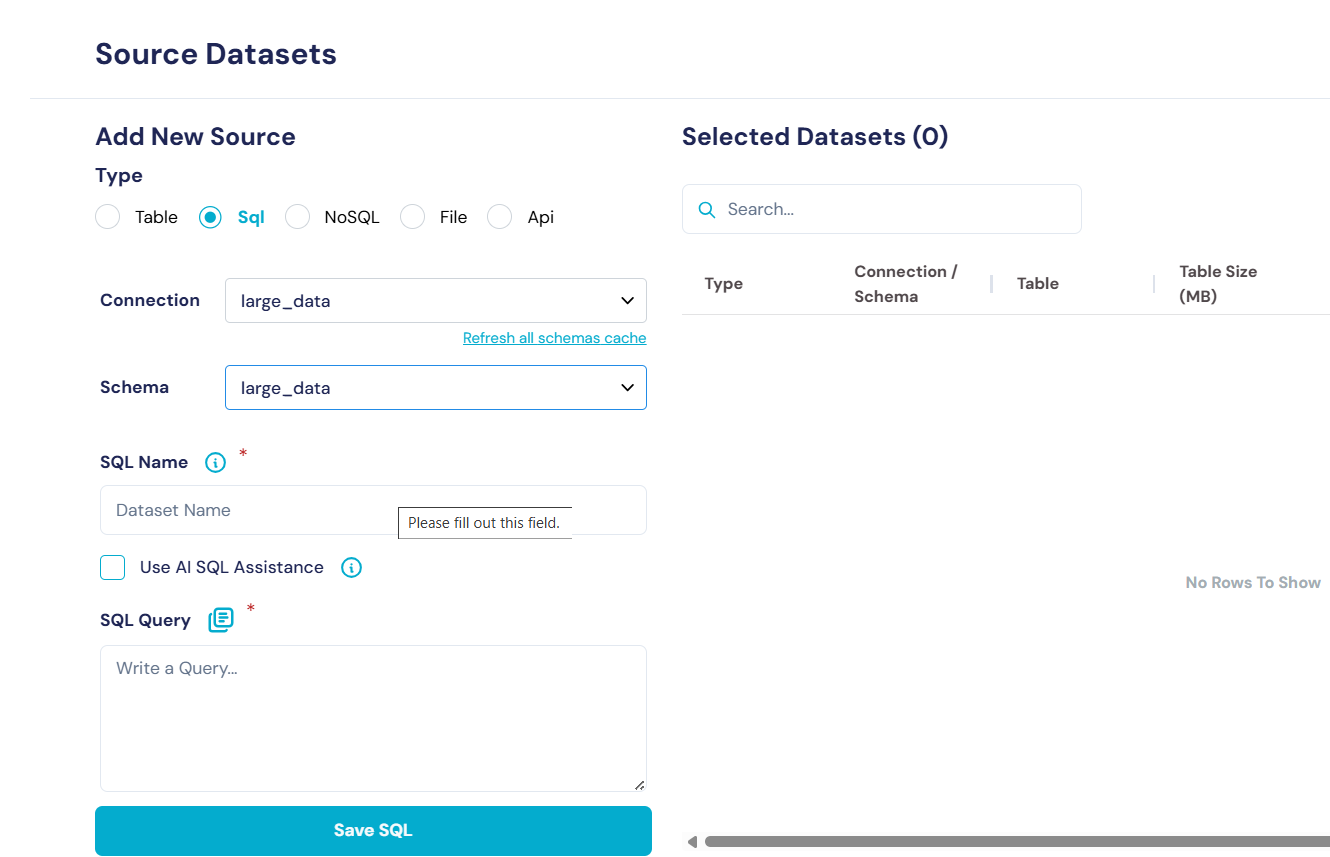
  • Select the Connection Name from the drop down menu.

  • Select the desired schema.

  • Provide the SQL and a name (the name should not have spaces).

  • Click on Validate.

  • If the SQL is valid, the SQL will be added to the list on the right side.

Instead of writing the SQL, we can also write the requirement in English

Steps to write the requirement in English

  • Select the Connection Name from the drop down menu.

  • Select the desired schema.

  • Provide the SQL and a name (the name should not have spaces).

  • Select checkbox "Use AI SQL Assistance"

  • Select all the tables, that are required for this SQL by clicking on "Add Tables"

  • In "AI Prompt", enter English description.

  • Click on "Generate SQL"

Example : select all records from customers table who have placed orders from orders table after year 2023

This is beta feature and there could be issues with generated SQL

SQL Input