# Variables
### Overview
In Vexdata, variables play a crucial role in enhancing the flexibility and reusability of test cases. By introducing variables, test cases can be designed to adapt dynamically to different data sets or conditions without the need for direct modification of the test case itself.
### When to use variables :
1. To filter data: Example: Let's say I receive data daily into a set of five tables. My test case validates these five tables. Instead of validating the entire dataset, I want to validate only a specific batch of data. In this case, I can use variables to define the criteria for filtering the data, such as a specific date range or a batch identifier.
2. Migrating the same test cases to different environments: When migrating test cases from the development environment to the QA environment, the database schema name may differ between the two environments. To accommodate this difference, variables can be used to store the schema name dynamically. By using variables, the test cases can be easily adapted to work in different environments without the need for manual modification of the schema references in each test case.
3. To execute test cases on different set of tables in a same environment. Instead of changing the test case, we can set variables for table name.
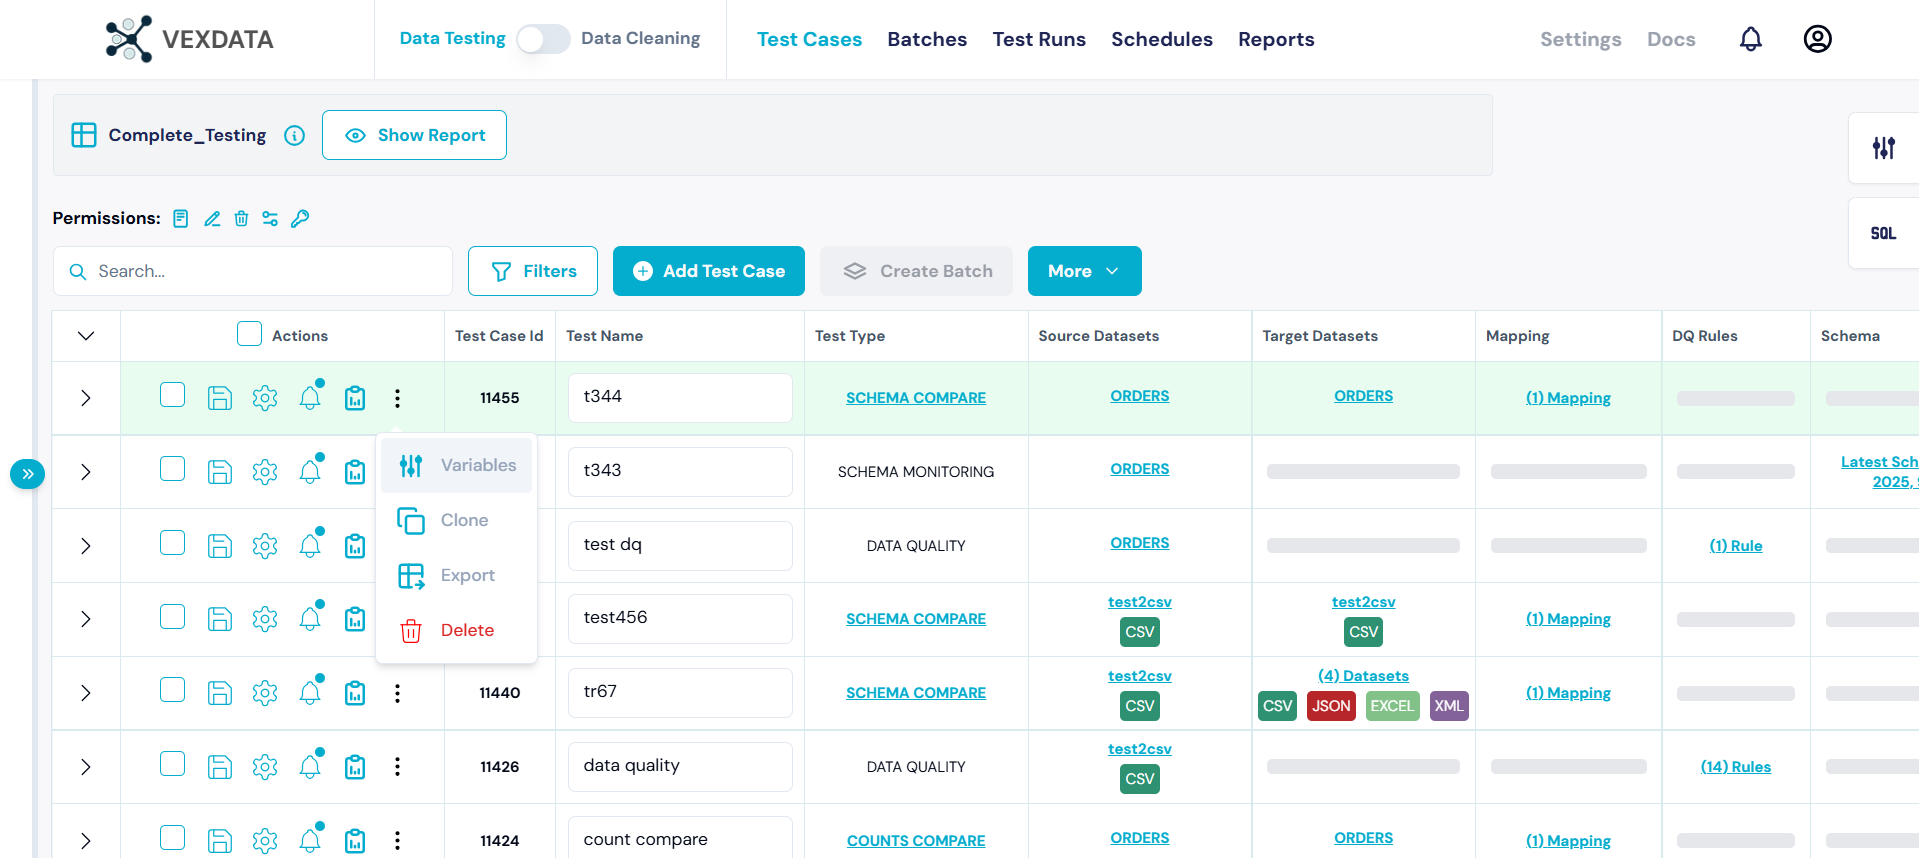
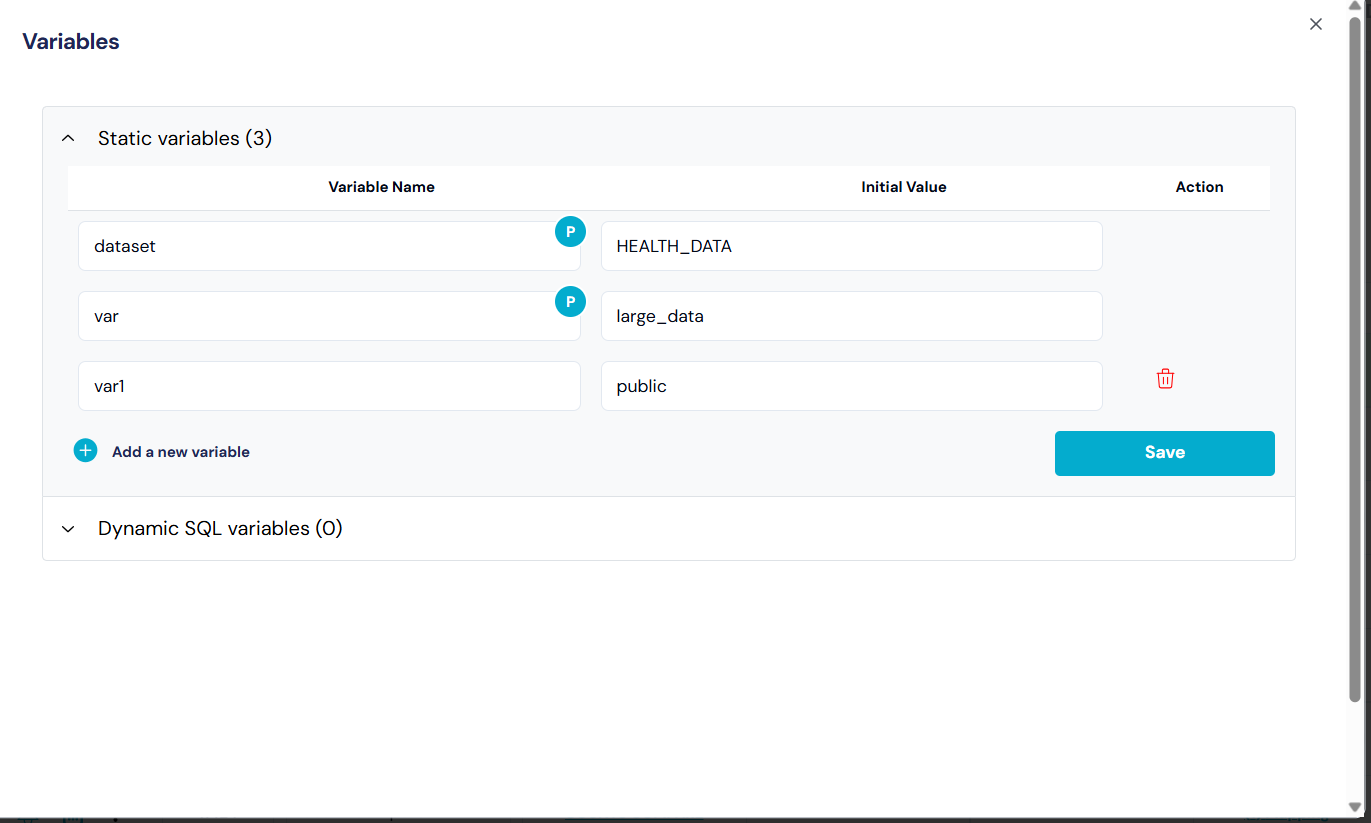
## Static Variable -
Static variables, in the context of VexData.io, refer to those that retain their value throughout the execution of a test case. These variables are typically declared and initialized at the beginning of the test case or provided at the beginning of a 'test run,' and they maintain their value until the end.
#### Example
Variable name : id
Initial value : 20 , The initial value will be used by default. When executing test cases as a batch, user can over write the variables and the new overwritten value will be used for that test run.
For eg - ${YYYY-MM-DD hh-mm-ss} will be replaced by actual date at runtime on daily run.
Create a static variable
####
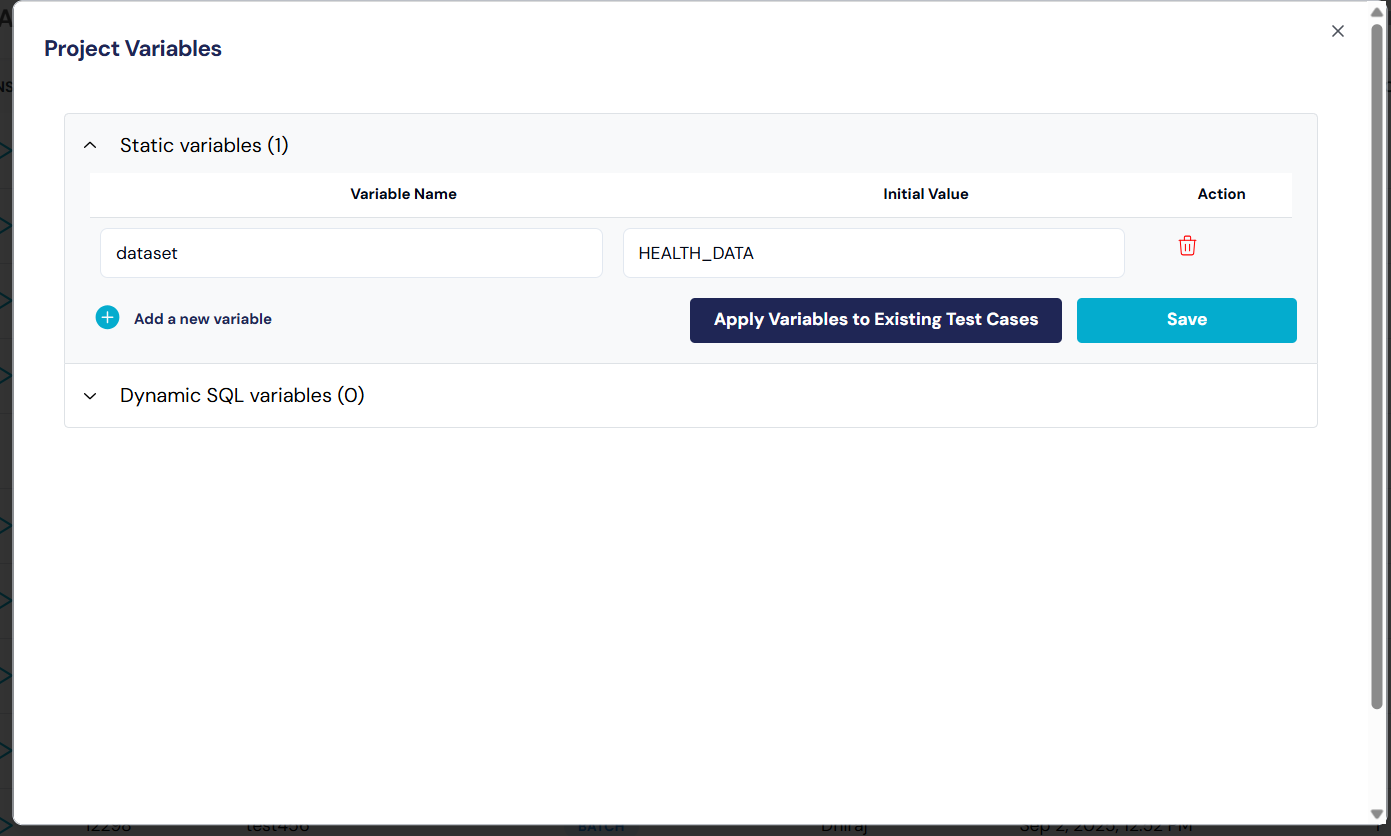
## **Project Level variable**
* These variables are defined at the project level.
* These variables can be accessed by all test cases within the project. They are ideal for constants or configurations that remain the same throughout the project's lifecycle.
#### Steps to create a project level variable :
1. **Navigate to the Project** : Select the project where user need to create a project level variable.
2. **Click on the Project Level Icon**: Locate and click on the project level icon to access variable settings within the desired project.
3. **Provide Variable Name and Value**: Enter the desired variable name and its corresponding value in the provided fields. Once entered, make sure to save the changes to finalize the variable creation.
{% embed url="" %}
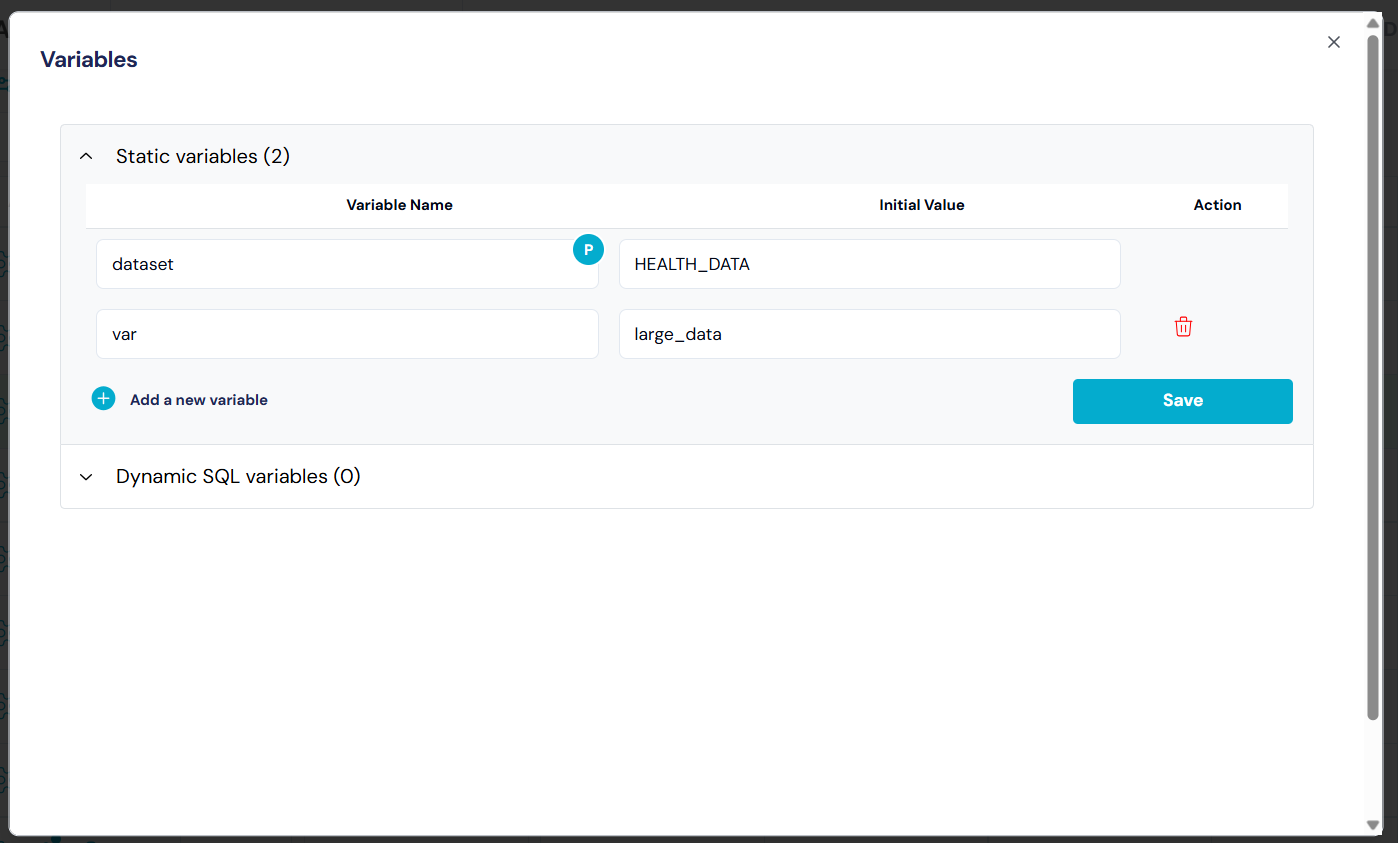
* **Test Case Level**: These variables are specific to individual test cases. They can be used to store values that are only relevant within the scope of a single test execution, allowing for more granular control over variable use in different scenarios.
#### Steps to Create a Test Case Level Variable
1. Open the test case where you want to add a variable.
2. Click on the **Variables** the test case editor.
3. Enter the desired variable name and its corresponding value in the provided fields. Once entered, make sure to save the changes to finalize the variable creation.
These steps allow you to manage and utilize variables tailored to specific test case needs, ensuring flexibility and precision in your testing process.
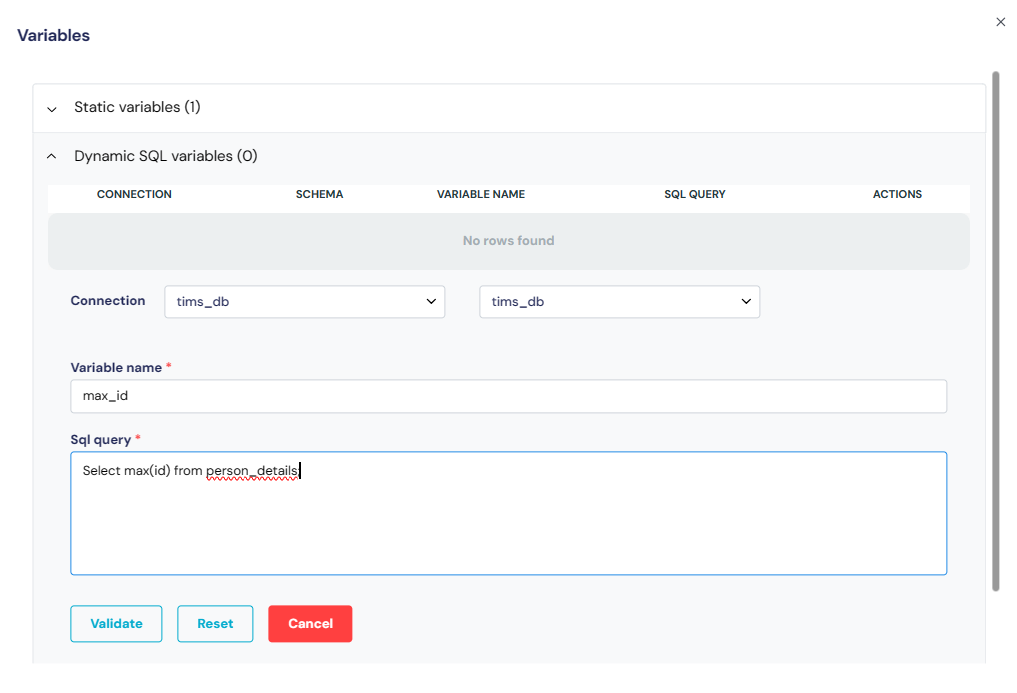
## **Dynamic Variable** -
On the other hand, dynamic variables within the VexData platform are initialized by executing a SQL query. The query is executed as a first step before executing the test case. The SQL query should produce only one value which is initialized to the parameter.
To use a variable in a test case, we have to rap the variable name in ${variable\_name}
#### Example
Variable name : id5
Query : `select max(batch_id) from sales_tbl`
To use the variable in the test case, use ${id5}
`select max(batch_id) from` ${id5}
The variable can be used as a table name, inside a sql query, schema name.
{% hint style="info" %}
The SQL query should output only one value.
{% endhint %}
The validate button validates the sql query and ensure the sql query is returning only one value. If the sql query is returning multiple records or multiple columns, the error message is displayed and sql query has to be fixed.
Create a Dynamic Variable
**How to create and use Static and Dynamic Variable in a test case**
{% embed url="" %}
## **Dynamic Date Variable**
Vexdata now supports dynamic date expressions directly within variable values. This eliminates the need to manually update date parameters each month or deployment cycle. Users can provide SQL expressions to generate date values which are evaluated at runtime.
**Syntax**
Use the keyword VEXD\_CURRENT\_DATE followed by a valid Spark SQL expression to compute the desired date format:
`VEXD_CURRENT_DATE `
Dynamic Date Variable
In the above screenshot, variable name is current\_month and value is
**Variable Name :** current\_month
**Variable Value :** VEXD\_CURRENT\_DATE date\_format(current\_date(), 'MMyyyy')
> The expression must be a valid Spark SQL date function, typically wrapped in a date\_format(...) clause to control output.
Examples
| Description | Expression | Result (if run in May 2025) |
| ------------------------- | ------------------------------------------------------------------------------ | --------------------------- |
| Current Month (MMYYYY) | VEXD\_CURRENT\_DATE date\_format(current\_date(), 'MMyyyy') | 052025 |
| Current Month (YYYY-MM) | VEXD\_CURRENT\_DATE date\_format(current\_date(), 'yyyy-MM') | 2025-05 |
| Current Month (MMM-YYYY) | VEXD\_CURRENT\_DATE date\_format(current\_date(), 'MMM-yyyy') | May-2025 |
| Previous Month (MMYYYY) | VEXD\_CURRENT\_DATE date\_format(add\_months(current\_date(), -1), 'MMyyyy') | 042025 |
| Previous Month (YYYY-MM) | VEXD\_CURRENT\_DATE date\_format(add\_months(current\_date(), -1), 'yyyy-MM') | 2025-04 |
| Previous Month (MMM-YYYY) | VEXD\_CURRENT\_DATE date\_format(add\_months(current\_date(), -1), 'MMM-yyyy') | Apr-2025 |
| Next Month (MMYYYY) | VEXD\_CURRENT\_DATE date\_format(add\_months(current\_date(), 1), 'MMyyyy') | 062025 |
| Next Month (YYYY-MM) | VEXD\_CURRENT\_DATE date\_format(add\_months(current\_date(), 1), 'yyyy-MM') | 2025-06 |
| Next Month (MMM-YYYY) | VEXD\_CURRENT\_DATE date\_format(add\_months(current\_date(), 1), 'MMM-yyyy') | Jun-2025 |